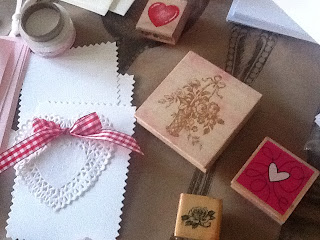
My first bit of advice is to keep it as simple as possible. You can cut construction paper into hearts, squares or rectangles or you can buy blank note cards in a variety of shapes and sizes at your local craft or stationary store. Next you can purchase a few rubber stamps, ie, hearts, flowers, or any other valentiney motif, and a stamp pad or two (red, pink or purple). Glitter is the next essential item needed because everything looks more dazzling with glitter and kids absolutely love it. I also highly recommend a glue pen to more easily delineate where the glitter will be "stuck". If you collect one or two items yearly, before you know it you'll have quite a collection and you can use this stuff for lots of occasions. I keep a box of blank note cards, glitter, glue pens, rubber stamps and stamp pads.

 |
| My nine year old daughter Lizzie loves doing art projects. |
Once you have your supplies and you've decided if you are going to cut out your valentines or use pre-cut note cards, you can experiment with colors and stamps and come up with endless designs. I'm always amazed at the things my kids come up with...it's obvious they got higher quality art intructucion in school because, they are far more likely than me, to think out of the box. We usually stamp the cards, then go back and add glitter and let them dry. After they dry (glitter and glue pen dry pretty fast...nothing like the dreaded gel!), we write our messages on them. One downfall is that you will have glitter in your life for the next week at least...I have glitter permamently ground into both of my tables...I think it adds life and character!
 |
| After stamping the card, add glue with the glue pen. |
 |
| Shake the glitter around.... |
 |
| ...and voile'! You have a unique, homemade card to give to someone dear. |
 |
| Stamp, glitter, voile'! |
 |
| Stamp, glitter, voile'! Lizzie thought this one up...she added glitter to the wings, tail feathers and trumpet flower. Lovely, don't you think? |
 |
| A small sampling of our creations. |

I hope you are inspired to try your hand at making your very own, custom, valentines.
Tiene mucha suerte! (Good luck!)


No comments:
Post a Comment